As I had not had much previous experience
with doing Special Effects Make Up, I was a bit anxious at the beginning of the
semester whether or not I would enjoy this topic as much as our previous
topics. However, I was proved completely
wrong. I have absolutely loved our
practical sessions with Sue, and feel as if I have really developed my skills
and learnt how to use a variety of new products, especially when creating cuts,
bruises etc. I also enjoyed our second
project, creating a look for TV and Film; it allowed us to be creative with
stronger looks. Over the year we have
learnt skills for many areas of the industry, and I feel this is really
important for the future. Within our
hair sessions, I also feel like I have really pushed myself in creating unusual
styles. We have been taught to create
bold styles, as well as sleek looks and I feel as though I have really improved
and feel a lot more confident in myself.
Wednesday, 30 April 2014
Tuesday, 29 April 2014
Hair Studio: Focusing on Mens Hair
- To start the look, create a horse shoe parting with a very defined left side parting and secure away any extra hair.
- Use the remaining hair from the side and the back and create a very flat french pleat.
- To create a sleek, polished style, check there are no flyaways To do this, take a little bit of mousse on a comb and brush over the hair gently.
- Bring the hair round from the front of the head, and secure round the french pleat, making sure you cannot see the ends. When doing this, keep in mind that there should still be a very prominent left parting.
- Finish the look with some hairspray.
Creating a Bowl Cut Style (Womens Hair)
- Start by combing through the hair, making sure there are no knots. To create this style, it would be best to choose a model with short or mid length hair.
- My model had a fringe, so I left this out, you may clip it up of you need to. Section the top of the hair off and clip this up. With the remaining bottom hair, create a very flat french pleat.
- Section the hair at the top into about 4 equal sections.
- Take each small section, and roll this under, rolling up towards the head. When you have rolled the hair, pin underneath with bobby pins.
- Carry on this process around the remaining hair.
- Once you have rolled all the sections, using a geisha pin, gently pull each section of the hair round, to ensure there are no visible gaps.
- Finish with hairspray.


Sunday, 13 April 2014
'Claudia' Gothic Horror Outcomes


I really liked the outcome of my Claudia design. The look overall is very dark, and this is what I was aiming for, to represent Claudia's dark, controlling personality. I kept the skin fairly pale, and created a blended smokey eye using grey and black tones, this way the 'evil' eyebrows didn't look too heavy. I created a dark ombre lip also, using purples and blacks. I think this turned out well, and really complemented to dark toned eyes. I wanted to keep the hair simple, so created a sleek, side ponytail.
Thursday, 10 April 2014
'Quentin' Gothic Horror Outcomes


These are my Final Images for the character of Quentin, the dark bold brows really emphasise the meaning of Gothic Horror, as does the slight grey tinge to the lips. I lined the waterline very lightly with a black pencil, as this made the eyes a little more closed in, and with the edition of the red around the eyes, this made them look puffy and as if 'Quentin' had been upset or crying. If I was to improve, I would make the watery eyes more prominent, as this didn't really capture very well in the photos.
Tuesday, 8 April 2014
Practicing My Claudia Make Up Design...
 |
| Grey, Blended Smokey Eye. |
 |
| Added 'Evil' Eyebrows. |
 |
| Complete Look Practiced. |

In preperation for my Final shoot, I wanted to practice my Claudia design to make sure I was happy with the general look, as well as the colour palette I had chosen. I wanted a really blended smokey eye, and I was happy with the way this turned out. If I was to improve the look, I would conceal the under eye area more, to make the eyes really stand out, as dark shades can often create a tired looking effect. Another element I like is the dark lip, however for my Final Shoot I will try to create more of an ombre effect with purple shades.
Saturday, 5 April 2014
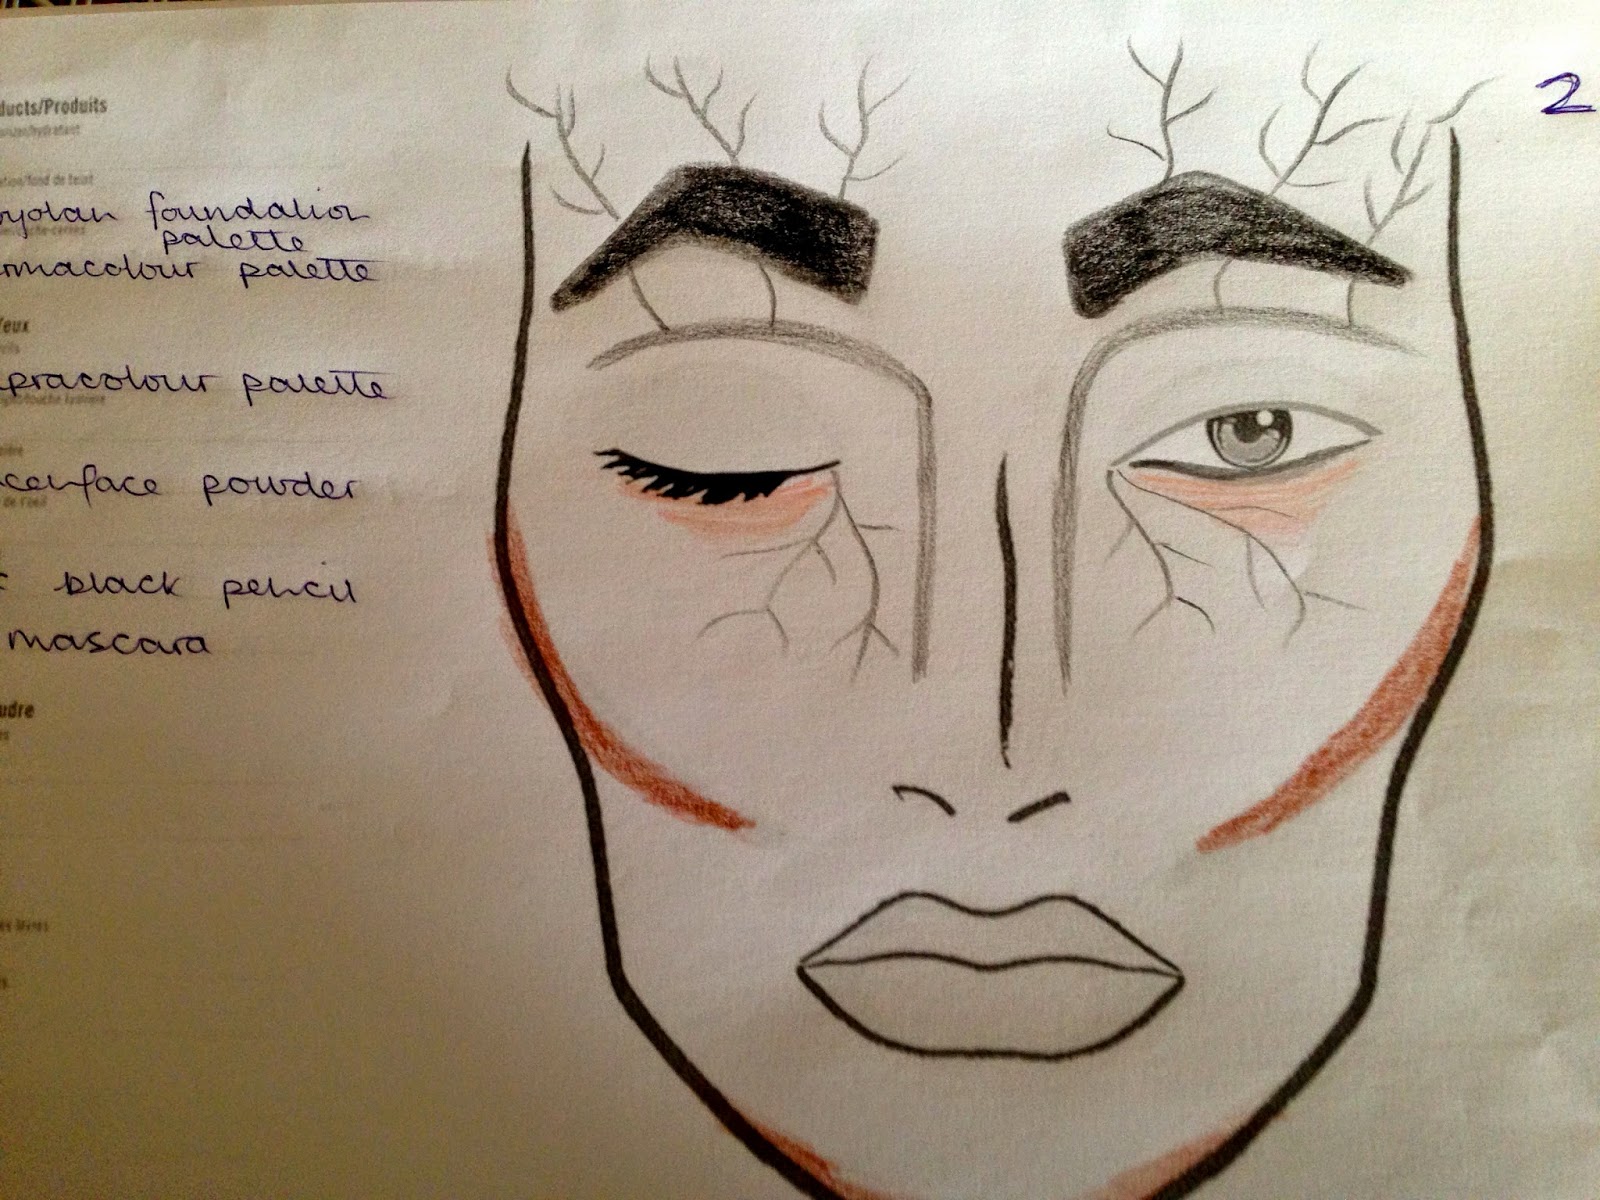
Quentin Face Charts
 |
 |
| Chosen Design |
I wanted my Quentin designs to be simple, but dark. I wanted to incorporate dark, strong brows for the Gothic Element, but red, puffy eyes. Almost as though he has been crying because he is stuck in a situation he cannot get out of, under Claudia's spell.
Claudia Face Charts
 |
| Chosen Design |


I wanted all three of my designs to be very dark and sultry to reflect Claudia's power. The use of dark, thick brows adds a fierce element to each of these looks, and with the smoky eye, the eyes are made to look bold. I like the idea of having bold eyes too, as this way, Claudia is able to seduce Quentin with her eyes, another reason why he is under her thumb. I have switched up the lips colours also, however I really like the dark purples and black as I feel red looks a little too soft for my desired effect. The look I will be creating for my interpretation of Claudia is LOOK 1.
Subscribe to:
Posts (Atom)